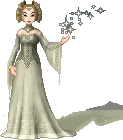
| Although I have written this tutorial for Paint Shop Pro, any program that support layers, like Adobe Photoshop, Serif Photoplus, Corel Photopaint or Ulead PhotoImpact, can be used. It does assume that you are familiar with whichever graphic program you are using. | ||
 |
 |
 |
| 1. Start with your completed doll that you want to add the shawl to. You must ensure that your doll is on a transparent layer, i.e. no background on the layer that contains the base body. | 2. I usually make the shawl a similar colour to that of the dress. Use the Dropper to select the colour you want to use. | 3. Create a layer named Back Shawl Outline and, using the Paintbrush, draw in the shawl that will be behind the doll. |
 |
 |
 |
| 4. Tidy up the edges to ensure that the it is 1 pixel thick at all points. | 5. Create a new layer named Shawl Back. Set your foreground colour to a slightly lighter shade of the outline & colour in the interior of the shawl shape. You will probably need to use the Paintbrush for this. |
6. Move both the Shawl Back Outline & Shawl Back layers below your doll. |
 |
 |
 |
| 7. Your doll should look something like this so far. | 8. Create a new layer just above Shawl Back called Back Shawl Shading. Select a shade slightly darker than the outline and, using the Paintbrush tool, draw in where the folds would be. | 9. Click on the Retouch tool, and amend the settings to roughly these. |
 |
 |
 |
| 10. Smudge the folds a bit to make them a little softer. | 11. Now, drop the opacity on each back shawl layer. These settings are just a guideline, play with the sliders until you have an effect you like: Back Shawl Outline - 95% Shawl Back Shading - 65% Shawl Back - 55% |
12. Create a new layer above your doll & clothes called Front Shawl Outline. Set your foreground colour to the same shade you used for the back shawl outline. Using the Paintbrush tool, draw in the front part of the shawl. |
 |
 |
 |
| 13. As before, tidy up the edges. | 14. Create a new layer named Shawl Front. Colour the interior of the front shawl in the same colour you used for the back section. | 15. Create a new layer just above Shawl Front called Front Shawl Shading. Select the same shade use for the back shawl shading and, using the Paintbrush tool, draw in where the folds would be. |
 |
 |
 |
| 16. Use the Retouch tool with the same settings as before to soften the folds. | 17. Create a new layer just above Front Shawl Shading called Highlight. Using a lighter shade than that used for the main shawl, draw in some highlight. | 18. Use the Retouch tool with the same settings as before to soften the highlight. |
 |
 |
 |
| 19. Now, drop the opacity on each front shawl layer. These settings are just a guideline, play with the sliders until you have an effect you like: Front Shawl Outline - 97% Front Shawl Highlight - 75% Front Shawl Shading - 55% Shawl Front - 75% |
20. Alternatively, you could set the opacity for all layers to 100% to make on opaque shawl. | 21. You can always add a fringe or some patterns for detail. |
 |
||
| Your shawl in complete! Be careful when saving this as a transparent gif because of the transparency. If you don't know what to do, take a look at my Transparency tutorial. | ||
| << back to tutorials | ||
all content © copyright amy roberts 2001-2007 (unless otherwise stated)


