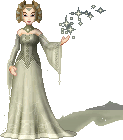
| This tutorial has been written for Paint Shop Pro 7. For more Transparency Tutorials, take a look at my Tutorial Listing. |
||
 |
 |
 |
| 1. Start with your completed doll that you want to make transparent. | 2. This step is optional, but I've learnt from my mistakes. To protect your original doll with all her layers, create a duplicate image by pressing SHIFT+D. Close the original. | 3. To preserve any "transparent" effects you may have on your doll (for example, the fins), flood fill the background layer the same colour as your page background. Alternately, leave it white so that it will look ok on most peoples pages in case it is adopted. For this tutorial, I will colour the background, but I usually leave it white. I will show you the results of both at the bottom so you can decide what you want to do. |
 |
 |
 |
| 4. From the toolbar, go to Layers/Merge/Merge All (Flatten). Or, your can right-click on one of your layers on the Layer Palette and choose Merge/Merge All (Flatten) - the effect is the same. You will be left with a single, merged background layer. | 5. You now need to set your foreground colour to a colour which is not used anywhere else in your image. Probably the easiest way to do this is to right-click on the foreground colour on the style palette... | 6. This will bring a box up of Recent Colour as well as 10 standard ones. You can pretty much guarantee that these particular shades of red, yellow, green, blue, teal or pink will not be present in your image. Select one you know you have not used. For this tutorial, I am using the red. |
 |
 |
 |
| 7. Using the Flood Fill tool, flood fill the background in your chosen colour. You may need to Zoom in to get to any little gaps. | 8. From the toolbar, go to File/Export/Gif Optimizer. | 9. On the first tab (Transpareny) select Areas that match this colour. Right-click in the colour swatch... |
 |
 |
 |
| 10. ...and your Recent Used Colours box appears again. Select the colour you used for your background. | 11. Set the Tolerance to 1. | 12. You should be able to see a preview of your transparent doll in the preview box (the checked background indicates transparency). It will also give you the curent file size. |
 |
 |
|
| 13. On the Partial Transpareny tab, use the settings as specified above. This will prevent those horrible little white pixels from messing your creation. | 14. On the Colours tab, select the number of colours and the method of colour selection. I usually use around 200 colours with Optimised Octree but feel free to play with the settings (keeping an eye on the image quality and overall file size). | |
  |
||
| All the remains is to click on OK and give your doll a name. I have included 2 version of the final image. The one of the left had a green background (the colour of my previous layout) before the layers were merged. The one on the right had a white background. The result is very subtle (take a close look at the fins), it makes more of a difference if your page background is very dark. Feel free to experiment! |
||
| << back to tutorials | ||
 dolls
dolls  bases
bases  resources
  tutorials
  contest
  links
links  doll maker
  faq
faq  about
about  forum
forum  guestbook

