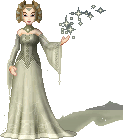
| Although I have written this tutorial for Paint Shop Pro, any program that support layers, like Adobe Photoshop, Serif Photoplus, Corel Photopaint or Ulead PhotoImpact, can be used. It does assume that you are familiar with whichever graphic program you are using. |
 |


|
 |
| 1. Start with your completed doll that you want to add the wings to. To give myself more room to work on, I usually increase the canvas size to about 300x300 |
2. I have created several colour palettes that you can use, but you are free to use your own colours, or use on of my other palettes. I have labelled the colours on the palettes to make them a bit easier to pick. |
3. Create a new layer named Top Wing Frame. We are going to make one wing, then copy and paste it to make the second! Using the Paintbrush with a width of 1, draw a curved line as above in palette colour 1. This can take a while until your make one you are happy with. |
 |
 |
 |
| 4. Press CTRL+C to copy the line. Press CTRL+E to paste the copy into the image. Move the second line so that the ends make a point, as shown here. At the widest part of the wing, there should be a gap of no more than 4 pixels between each line. |
5. Select the number 3 colour from your palette and, using the Paintbrush, line the bottom line with colour. |
6. Select the number 5 colour from your palette and line the top line with colour. |
 |
 |
 |
| 7. Select the number 8 colour from the palette and edge the top line with colour. |
8. Select the number 6 colour from the palette fill in any remaining white spaces. |
9. Create a new layer named Top Wing Fill. Select colour number 1 from the contrasting palette you are going to use. Draw a ragged wing shape. |
 |
 |
 |
| 10. Using the Eraser tool set to a width of 1, tidy up the line you have just drawn so that it is only 1 pixel thick at all places. |
11. Using the palette colour 1 that you used for your wing frame, draw in veins on the wings. Again, use the Eraser tool to ensure that they are a nice even 1 pixel width at all times! |
12. Select colour number 3. Draw a line of colour under the wing frame extend each of the points on the wing inwards and between each vein, as shown above. |
 |
 |
 |
| 13. Select colour number 5 and edge the lines you drew in the previous step with colour. Add a little extra colour on the right hand side of the lines. |
14. Repeat this process colours 6 & 7. Your wing should look something like this so far. |
15. Create a new layer named Wing Frame Bottom and repeat steps 1-8 to make a second wing, below the first. |
 |
 |
 |
| 16. Create a new layer named Wing Fill Bottom and repeat steps 9-14. |
17. Hide all layers except for your 4 wing ones. Merge the visible layers. Press CTRL+C to copy the merged wings. |
18. Unhide your layers. Create a new layer named Right Wing. Press CTRL+E to paste the copy of the wings onto this layer. Obviously, this wing is now the wrong way around. Press CTRL+M to mirror the image. Use the Move tool to position this wing correctly. |
 |
| Your wings are complete! There are many different ways of making wings, this is just how I make mine. Take a look at my tutorial listing for some more wing tutorials. |
| << back to tutorials |


 dolls
dolls  bases
bases  resources
  tutorials
  contest
  links
links  doll maker
  faq
faq  about
about  forum
forum  guestbook

