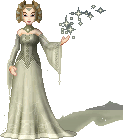
| Although I have written this tutorial for Paint Shop Pro, any program that support layers, like Adobe Photoshop, Serif Photoplus, Corel Photopaint or Ulead PhotoImpact, can be used. It does assume that you are familiar with whichever graphic program you are using. | ||
 |
       |
 |
| 1. I always prefer to do the hair last, but that's just my personal preferance. | 2. I have created several colour palettes that you can use, but you are free to use your own colours, or use on of my other palettes. | 3. Create a new layer & using the 2nd darkest shade (the 2nd along in my palette) & the Paintbrush tool, draw in the first (top) lock of hair. I like to start it slightly to the left of the centre if the hair is going to be blowing right, but it's a personal choice. |
 |
 |
 |
| 4. Now you need to clean it up. You'll notice I've highlighted some problem areas on the one that I have drawn. Try to keep the top & bottom lines the same thickness, make the lines smooth & 1 pixel thick at all points. You can either use the Smudge tool set to size 1 & opacity 100 or the Paintbrush & Eraser tools for this. | 5. Eventually you should come up with a nice, neat shape that you're happy with. Don't worry if it feels like it's taking forever - it even takes me time to get the shape as I like it. If you get the basics looking good, the whole doll will end up looking better. | 6. Flood-Fill the interior of this shape with the lightest colour. |
 |
 |
 |
| 7. Using the 2nd lightest colour, draw in the strands of hair. They don't have to be perfect, just try to follow the shape of the hair. Again don't worry if it's messy... | 8. ...you can always tidy it up. | 9. Click on the Retouch tool & make your setting approximately the same as those above. This will depend on the hair colour & size of doll. Don't be afraid to experiment! |
 |
 |
 |
| 10. Darken the areas of hair that bulge "inwards". For me, this is usually the downward loops. Add the most shading to the centre & less out to either side. Add some shading to the centre parting too. |
11. Amending your Retouch settings to approximately those above. | 12. Lighten the areas that "bulge out" - this is where the light would catch it. Again, the lightest area is in the centre of the bulge. |
 |
 |
 |
| 13. Amend the settings of the Retouch tool to those above. | 14. To define the strands, smudge strands of the highlight into the darker areas & strands of the darker areas into the highlight. | 15. Your hair should be looking something like this now. You can always add more shadow or highlight if you feel it needs it. The Dodge mode works well to add highlight too if a low opacity is used. |
 |
 |
 |
| 16. Create a new layer behind your first layer. Using the darkest shade, draw the hair on the rest of the head & make this flow out behind your doll. | 17. Tidy up the edge... | 18. ...& fill with the same colour used for the outline on the front section of hair. |
 |
 |
 |
| 16. Repeat steps 7-14 using the outline colour to define the strands. Make the hair a little darker behind the head & shoulders. | 17. Continue in this way adding a new layer for each piece of hair. That way, if you don't like a section, you can just delete the bit you don't like without messing up the rest. | 18. Eventually you hair should look something like this. It can be time-consuming, but be patient, the results are worth it. |
 |
||
| Your wind blown hair is complete! | ||
| << back to tutorials | ||
all content © copyright amy roberts 2001-2007 (unless otherwise stated)


