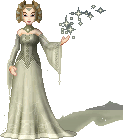
| Although I have written this tutorial for Paint Shop Pro, any program that support layers, like Adobe Photoshop, Serif Photoplus, Corel Photopaint or Ulead PhotoImpact, can be used. It does assume that you are familiar with whichever graphic program you are using. | ||
 |
 |
 |
| 1. I always find that this looks best on a base that's not a normal skintone. Green & blue bases are always nice. See my colourising tutorial for more information. | 2. Create a new layer. Give it a useful name like Patterns or Markings. | 3. Set your foreground colour to a darker shade of your main base colour. For this base, I am using #97AB6D. Using the Paintbrush tool, draw irregular shaped blobs over your base. I try to keep them mostly in the places that freckles would show i.e. those areas most exposed to sunlight. Unless you are working on a very large base, I would avoid patterns on the face as it can look too "busy". |
 |
 |
 |
| 4. When you have finished, your base should look something like this. | 5. Select the Retouch tool and use approximately the same settings as above. | 6. Soften the inner edges of the bigger blobs to blend them in a bit better. |
 |
 |
 |
| 7. If you are happy with how it looks, you can leave it now, or you can play with Layer Blend Modes! | 8. This is the Blend Mode set to Multiply. | 9. This is the Blend Mode set to Burn. |
 |
||
| Your base is now ready for use. | ||
| << back to tutorials | ||
 dolls
dolls  bases
bases  resources
  tutorials
  contest
  links
links  doll maker
  faq
faq  about
about  forum
forum  guestbook

