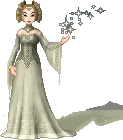
|
Although I have written this tutorial for Paint Shop Pro, any program that support layers, like Adobe Photoshop, Serif Photoplus, Corel Photopaint or Ulead PhotoImpact, can be used.
It does assume that you are familiar with whichever graphic program you are using. This tutorial was inspired by Josie's fantastic velvet tutorial. She inspired me to experiment with the wonder of the Smudge Brush! |
||
 |
        |
 |
| 1. Open the base you are going to use. I usually give mine a white background to work with. Create a new layer named Dress. Select the Paintbrush tool with a size of 1. |
2. I have created several colour palettes that you can use, but you are free to use your own colours! I have labelled the colours on the palettes to make them a bit easier to pick. | 3. Choose palette colour number 1 and draw the outline of the dress. It always helps to Zoom in on the image while you do this. Don't worry if it's a bit messy, we'll clean it up in the next step. |
  before after |
 |
 |
| 4. Choose the Eraser tool and set the size to 1. Zoom in on your image and erase any extra pixels - you want the dress to be 1 pixel think at all points. Also make sure that the lines of the dress are smooth, get rid of any ugly bumps by deleting and redrawing sections. |
5. Select the number 2 colour from your palette and Flood Fill the interior of your dress. | 6. Click on the Magic Wand tool. Click on the area outside of the dress. When this is selected, go to Selections/Save to Alpha Channel. Click on OK and on the New Channelscreen, type in Dress Outline and OK This is will save the selection and we won't have to keep selecting it again. |
 |
 |
 |
| 7. Create a New Layer and name it Dress Shading. Pick colour 1 from the palette. Select the Airbrush tool with a Size of about 5, Hardness of 0, Opacity of about 60% and Density of 100. |
8. Airbrush the shading on to the doll. Pay particular attention to the folds at the bottom of the dress and the shape of the body, if it is a tight fitting dress like this one. Don't go over the top and don't worry if you go over the edges. Yes, I know it looks pretty rubbish, but the magic will happen with the next step. |
9. Select the Retouch tool. Choose Smudge from the drop down list and enter approximately the settings above |
 |
 |
 |
| 10. Now, carefully, start smudging the shading you made before. It's a lot easier than it seems at first, just take your time. Smudge the dress folds downwards to begin with... |
11. ...then upwards to shape them. | 12. Continue in this way, smudging up, down and sometimes across until you are happy with the way it is blended. Take you time and watch how the folds develop. |
 |
 |
 |
| 13. When you are happy, go to Selections/Load from Alpha Channel. Load Dress Outline. Press Delete on your keyboard to delete the excess blur, then press CTRL+D to drop the selection. Your doll should now look something like this so far. If you are not happy with the shading, you can always smudge some more, add some more, delete some more etc until you are satisfied. |
14. If you are happy, we are now ready to add the highlight. Create a new layer called Dress Highlight. Use the Airbrush with the same settings as before, only make the size 2 to draw on some highlights. | 15. As with the shading, use the Retouch tool to smudge the highlight downwards. You may want to change the Size down to around 5. |
 |
 |
 |
| 16. Then start smudging upwards and from side to side or around the curves, as necessary. | 17. To delete any excess highlight that has gone over the edge, go to Selections/Load from Alpha Channel. Load Dress Outline. Press Delete on your keyboard. Your doll should look something like this. | 18. Now all you need to complete the look is some hair, a face and accessories! |
 |
||
| Your doll is complete! | ||
| << back to tutorials | ||
 dolls
dolls  bases
bases  resources
  tutorials
  contest
  links
links  doll maker
  faq
faq  about
about  forum
forum  guestbook

