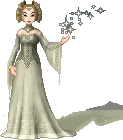
| Although I have written this tutorial for Paint Shop Pro, any program that support layers, like Adobe Photoshop, Serif Photoplus, Corel Photopaint or Ulead PhotoImpact, can be used. It does assume that you are familiar with whichever graphic program you are using. | ||
 |
         |
 |
| 1. Open the base you are going to use. I usually give mine a white background to work with. Create a new layer named Dress. Use the Paintbrush tool with a size of 1. |
2. I have created several colour palettes that you can use, but you are free to use your own colours! I have labelled the colours on the palettes to make them a bit easier to pick. | 3. Choose the number one colour of the palette and draw the outline of the dress. It always helps to Zoom in on the image while you do this. Don't worry if it's a bit messy, we'll clean it up in the next step. |
  before after |
 |
 |
| 4. Choose the Eraser tool and set the size to 1. Zoom in on your image and erase any extra pixels - you want the dress to be 1 pixel think at all points. Also make sure that the lines of the dress are smooth, get rid of any ugly bumps by deleting and redrawing sections. |
5. Select the number 2 colour from your palette and Flood Fill the interior of your dress. | 6. Click on the Magic Wand tool. Click on the area outside of the dress. When this is selected, go to Selections/Save to Alpha Channel. Click on OK and on the New Channelscreen, type in Dress Outline and OK This is will save the selection and we won't have to keep selecting it again. |
 |
 |
 |
| 7. Create a New Layer and name it Dress Shading. Select colour 1 from the palette again and draw on your dress where the shading would be. Don't worry if it goes over the line, this actually creates a better effect! | 8. Go to Effects/Blur/Gaussian Blur. Set the Radius to between 2 to 3 - for this tutorial, I used 2.5. | 9. Go to Selections/Load from Alpha Channel. Dress Outline should be highlighted. Click on Ok. The outline of the dress should now be selected. |
 |
 |
|
| 10. Press Delete on your keyboard to delete the excess blur, then press CTRL+D to drop the selection. Your doll should now look something like this so far. If you're not happy with the shading, try to make it a pixel thinner or thicker until you think it looks good. | 11. Create a new layer caller Dress Highlight. Select colour 3 from the palette. As with the shading, draw on the dress where the shading should be. | 12. Go to Effects/Blur/Gaussian Blur. Set the Radius to between 2 to 3 - I used 2.5 again. |
 |
 |
 |
| 13. Go to Selections/Load from Alpha Channel. Load Dress Outline. Press Delete on your keyboard to delete the excess blur, then press CTRL+D to drop the selection. Your doll should now look something like this so far. | 14. As you can see, I have sneakily made the dress long enough that I can get away with very little in the way of shoes! I have just drawn a couple of lines to give the effect of strappy sandles. | 15. Add the face, hair and whatever accessories you want. |
 |
||
| Your doll is complete! You can use this technique for a wide range of outfits, from skirts to shirts and trousers. | ||
| << back to tutorials | ||
 dolls
dolls  bases
bases  resources
  tutorials
  contest
  links
links  doll maker
  faq
faq  about
about  forum
forum  guestbook

