Roses |
||
 |
 |
 |
| 1. For ease of use, I suggest you make your roses on a new, transparent layer. You can either use one of my palettes or colours of your own choice. | 2. Set your foreground colour to the darkest shade. Draw a squiggly rose shape with the Paintbrush tool with the size set to 1. I usually have a spiral-ish shape in the middle & then a few blob like shapes representing petals. Becuase it is so small, we only need to create the "illusion" of a rose, it's doesn't have to be perfect! | 3. Tidy up the edges with the Paintbrush & Eraser, or with the Smudge brush with a width of 1 & the Opacity set to 100. |
 |
 |
 |
| 4. Using the middle shade, colour in the areas of the petals that would be more in the shade. You can go over some of the internal lines with this shade, it will give it a more natual feel. | 5. Fill in any of your remaining areas with the lightest shade. | 6. Your rose should look something like this! |
 |
 |
 |
| 7. Smaller roses are even simpler in appearance. | 8. Fill in as before. | 9. Just add some leaves & you're done! |
Small Daisies |
||
 |
 |
 |
| 1. You only need 2 colours to make daisies - one of the centre & one for the petals. These are just some colour suggestions, you pick whatever colours you like. Yes, I'm pushing the definition of daisy, but they're just pixels :p | 2. Draw a single pixel dot the Paintbrush tool to be the center of the daisy. Edge the pixel with the colour you want the petals to be. | 3. Click on the Eraser tool & use the settings shown above. |
 |
 |
 |
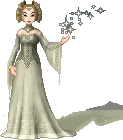
| 4. Use the Eraser to make certain petals semi-transparent. The more times you go over a pixel, the more transparent it will become. | 5. Your daisy should now look something like this. Not much on it's own... | 6. ...but they look quite sweet in a crowd! This is the technique I used to make the flowers on my fariy, Naia. |
Big Daisies |
||
 |
 |
 |
| 1. You need about 4 colours for the bigger daisy. 2 for the centre & at least 2 for the petals. | 2. Select the darkest shade of the centre & draw a oval-ish shape. | 3. Flood Fill the shape with the lighter colour you've chosen for the centre. |
 |
 |
 |
| 4. Select the darkest petal shade & draw in petals. 5 is a good number of petals. You can either make them rounded or pointed, the choice is yours. | 5. Clean up the petals with the Paintbrush & Eraser, or with the Smudge brush with a width of 1 & the Opacity set to 100. | 6. Flood Fill the petals with the lighter petal colour. |
 |
 |
 |
| 7. Add a little shading with the petal outline colour. It you like the effect, you can leave it at that. | 8. Otherwise, click on the Retouch tool & use the settings shown above. | 9. Blend the shading a little with the smudge brush. |
 |
 |
 |
| 10. If you Zoom out on your image, it should look a little something like this. | 11. Of course, you can use this technique to make smaller flowers too. | 12. Add some leaves & you're done. |
| Have fun! | ||
| << back to tutorials | ||
 dolls
dolls  bases
bases  resources
  tutorials
  contest
  links
links  doll maker
  faq
faq  about
about  forum
forum  guestbook

