|
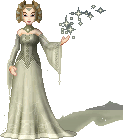
Although I have written this tutorial for Paint Shop Pro, any program that support layers, like Adobe Photoshop, Serif Photoplus, Corel Photopaint or Ulead PhotoImpact, can be used.
It does assume that you are familiar with whichever graphic program you are using. |
||||||
 |
                |
 |
||||
| 1. Start with your completed doll that you want to add the wings to. To give myself more room to work on, I usually increase the canvas size to about 300x300 | 2. I usually use a 2 shades of one of the primary doll colours for the wings, but I have also included some palettes for you to use instead. Play around with these, the end results vary quite a bit depending on the original colours and gradients used. | 3. Create a new layer behind your doll named Wings. We are going to make one wing, then copy and paste it to make the second! Using the darker of your 2 shades, select the Paintbrush with a width of 1, draw a wing shape. This is the trickest part of the whole business! | ||||
  before after |
 |
 |
||||
| 4. When you are happy with the wing shape, use the Eraser Tool to neaten up the edges of the wing so that it is 1 pixel think at all times. | 5. Flood Fill the interior of the wing in the lighter colour. | 6. Using the darker shade again, draw a network of lines across the wing. | ||||
  before after |
 |
 |
||||
| 7. Use the lighter shade and the Paintbrush tool to clean up the lines, again trying to ensure that they are 1 pixel think at all points. | 8. Select the Retouch tool and enter the above settings. You do not have to have them exactly the same, feel free to experiment. | 9. Using the Retouch tool, lighten the centre area of the wing, as shown above. This is just to create a little more texture, just a single stroke should suffice. | ||||
 |
|
 |
||||
| 10. Select the Magic Wand tool and click anywhere outside of the wing. Go to Selections/Invert. Your wing should now be selected. | 11. Create a new layer named Wing Gradient. You now need a nice gradient fill. You can either use one of the preset ones, create your own, or download one (or more!) of the above gradients. Just save them to your PC, then unzip them to the Gradient folder within the Paint Shop Pro directory. | 12. Select the Flood Fill tool and select the Gradient fill option on the style palette. | ||||
 |
 |
 |
||||
| 13. Select your gradient from the drop down list. Ensure that Linear Gradient is selected (the very top one). Set the angle to about 45 degrees. | 14. The wing selection should still be active on your new layer. Flood Fill the selection. It looks messy at the moment, but it will improve. | 15. On the layer named Wings, press CTRL+C to copy the wing, then CTRL+E to paste it as a new selection. | ||||
 |
 |
 |
||||
| 16. Obviously, this wing is now the wrong way around. Press CTRL+M to mirror the image and move it into position. Press CTRL+D to drop the selection. | 17. Go to the layer named Wing Gradient and repeat the process. CTRL+C to copy, CTRL+E to paste as a new selection, CTRL+M to mirror the image. Move the gradient into place over the top of the existing wing. | 18. Here's the clever bit. For the layer named Wing Gradient, on the Layer Palette set the Blend Mode to Colour and drop the Opacity to about 30% (Alternatively, go through all the different blend modes and see which one you like the most). This gives the wing a hint of colour, making it look almost iridescent. | ||||
 |
 |
 |
||||
| 19. Drop the Opacity on the layer named Wings to about 80% as well, to make them look a little more translucent. | 20. Because we have lowered the Opacity of the wings, I would recommed merging all layers before you save this as a gif, otherwise it could end up looking very messy. To ensure that you don't mess up your original, save the original, then duplicate the doll by pressing SHIFT+D. | 21. Go to Layers/Merge/Merge All (Flatten). Your image should now be a single layer and ready to be saved as a gif. | ||||
 |
||||||
| Your wings are complete! There are many different ways of making wings, this is just one method. Take a look at my tutorial listing for some more wing tutorials. | ||||||
| << back to tutorials | ||||||
 dolls
dolls  bases
bases  resources
  tutorials
  contest
  links
links  doll maker
  faq
faq  about
about  forum
forum  guestbook


